Wednesday, 11 December 2013

DIY: Eucalyptus Lotion Bars

Recently I popped into the beloved Lush store and i'm not sure if it was my imagination or not but I felt as if the prices had gone up on certain products. Feeling inspired I thought that I would have a go at creating my own massage bar and I am quite impressed with my efforts. The lotion/massage bar melts to your touch and is extremely moisturising and leaves a glow to your skin.


The recipe makes three palm sized bars.


What you'll need:
56g of beeswax
56g of coconut oil
56g of shea butter
Desired amount of eucalyptus essential oil (or any essential oil that you wish)
Moulds (I used a muffin pan)

How?
1. Melt the beeswax, coconut oil and shea butter all together in a double boilers (a pot filled with water with a heat safe bowl on top, not touching the water)

2. Take of the boiler and add your essential oil.

3. Pour into your mould and wait until set.


It is that easy!


Do you prefer lotion bars or regular lotion in a tub etc.?

xoxo M

Tuesday, 10 December 2013

DIY: Calming Body Balm

Lately I have become really interested in making my own beauty products. So through browsing pinterest and google I have found some really good recipes and adapted them to my liking.

This creation is a soothing and calming body balm. With lavender properties it soothes me when i'm feeling stressed and is packed with moisturisers for smooth and glowing skin.


What you'll need:
23g of coconut oil
16ml of olive oil
7.5g of beeswax
Desired amount of lavender essential oil
Tin


How to?
1. Melt the beeswax, coconut  oil and olive oil together in a double burner (boiling water in a pot and a heat safe bowl on top not touching the water).


2. Once all ingredients are melted take off the stove and add the essential oil.


3. Pour into the tin and allow for time to set. 


It is seriously that easy, the only difficult part was cleaning the wax off utensils etc. which can be easily done with hot water.


What beauty creations do you like making?

xoxo M

Sunday, 8 December 2013

NOTD: Christmas Edition #1

As we are getting close to Christmas I have decided to make sure that my nail designs are festive! At the moment I wear fake nails (because I want to be fancy) however, as I'm stingy and won't pay to get my nails done I picked up a pack of 110 nails from Daiso where everything in the store is $2.80. So I thought it was a sound investment.


So here is the nail look that I am sporting at the moment. I have actually got so many compliments from friends and complete strangers.


The colours used are Essie's 'Sand Tropez' and Australis 'Carnivale Chaos' which was layered on at the tips, then gradually faded towards the base.


What are some of your favourite christmas nail colours or combinations?

xoxo M

Thursday, 5 December 2013

Favourite Red Lip

I am obsessed with a bold lip, any colour and I am there. The classic red lip does hold a special place in my heart though. I feel confident and in control when I am rocking one. I will wear a red lip and basic eye literally anywhere; at work, meeting friends for lunch, a night out or when i'm home and bored.

These are my top 5 favourite red lipsticks...


Revlon Super Lustrous in Raspberry Bite, Revlon Lipstick in Coral, Australis Colour Inject in Cha Cha, Revlon Just Bitten Kissable Balm Stain in Romantic and Essence Lipliner in Red Blush.

Revlon Super Lustrous in Raspberry Bite
An extremely bold lipstick that is not for the faint hearted. This vampy lipstick will made a gorgeous bold statement to your look. I'd describe this shade as a dark berry. Perfect for the holiday season!


Revlon Lipstick in Coral
Such an unique shade that is perfect for those hotter months. It brings brightness and colour to your face. This shade is a red toned coral.


Australis Colour Inject in Cha Cha
This is the classic red shade that I think of when it comes to red lipstick, not to dark, not to bright. Perfect for all occasions, i'd say this shade is slightly blue toned which equals whiter teeth.


Revlon Just Bitten Kissable Balm Stain in Romantic
I have spoken about this lip colour before on my blog, because I absolutely adore it. This is a perfect 'everyday' shade because of its subtle tint and colour. It doesn't budge so that you can feel safe knowing that you don't have to constantly check for fading and smudging. 


Essence Lipliner in Red Blush
By itself to me this shade is very grown up and sophisticated when applied all over the lip with a clear gloss. When this matte lipliner is used as a base for another red lipstick this combo will last such a long time.


Before i'm off I just have a few quick tips for wearing this amazing shade on your lip;
- Exfoliate and moisturise you lips before.
- Pair with a 'neutralish' eye look.
- Have fun with it and own the look!!

What's your favourite lip colour?

xoxo M

Wednesday, 4 December 2013

MUA Collection Review

I first got onto MUA cosmetics through reading Mel from misstango2's reviews and ever since have been infatuated with the affordable prices and the brilliant shades. Personally, I order these products on the MUA website with just under $15 postage, so order big or with a friend.

I have put in prices from when this post was written in AUD, but they always have sales and currency rates change.

So lets get into my collection...


Pressed Powder in Shade 2 ($1.80)
This is just an everyday pressed powder nothing special about it, but ideal to put into your bag for touch ups throughout the day. I use this to set my foundation as the coverage alone would not be enough for my liking.

Powder Blusher in Shade 2 ($1.80)
A beautifully pigmented pink coral shade. I find that this colour is perfect for spring and summer as it adds a catching colour and glow to your cheeks.

Love Heart Lip Balm in Kiss Me ($1.80)

A moisturising glossy lip balm that leaves a ever so slight red tint to your lips. The lip balm has that typical vanilla smell (which I love).

Pressed Powder, Blush, Lip Balm


3 in 1 Extreme Contour Liner in Smoked Plum ($2.70)
A muted dark plum colour that looks very subtle yet put together on the lower lash line instead on brown or black eyeliner. I'm not sure how it is a '3 in 1' product, but anyway it is still a great product that can be easily blended. However, I would say that it doesn't have the best staying power and can fad throughout the day.

Intense Glitter Eyeliner in Gold Nugget ($1.80)
The product is creamy and easy to apply. I have been using it on the bottom of my lash line or inner tear duct for a christmas spice up. This shade is on the rose side of gold which is so unique. 

Fashion Secret: Gel Eyeliner in 24- 7 Style ($2.70)
This is such a crazy shade to me! It is black with green shimmer to it. So different and looks flattering on the eye. I'm so excited to experiment more with this shade. The product it self is creamy and does not tug on the eyelid.

Fashion Secret: Gel Eyeliner in Dress Up Chic ($2.70)
A true gold shimmery shade. Its consistency is also creamy and does not tug on the eyelid at all.

Smoked Plum, Gold Nugget,


Single Eyeshadow in Shade 13 ($1.80)
A dark plum shade with a pearl finish. I would most definitely prime your eyelids before using these shades. But they do however, have great staying power for the price.

Single Eyeshadow in Shade 10 (1.80)
Another pearl finish, this shade is a gorgeous dark navy colour that looks amazing in your typical smokey eye.

Single Eyeshadow in Shade 12 (1.80)
This is such an unusual shade. Its like a shimmery copper that in different lights is olive green! 

Shade 13, Shade 10, Shade 12

Eyeshadow Palette: Dusk til Dawn ($7.19)
This really is a dusk til dawn product! Most of the shade compliment each other beautifully. And so many different looks (day or night) could be created using this palette. This is a product that I would take travelling as it has so many different day or night looks included. Just like the single eyeshadows they are so pigmented however, a primer would be needed to keep the little suckers from moving. And even then the shades may fade.

The palette includes shades that can highlight to be used to add 'smoke' to the lid. There are rose golds, bright golds, bright turquoise, dark blues, taupes and many more. They are all on the shimmery to pearl side.

So thats my collection, are there any products that you recommend me checking out from MUA cosmetics?

xoxo M

Tuesday, 3 December 2013

Bronzed and Ready...

So as Australia is heading into those hot summer days and night, it is time to get prepared to bare your skin! I have gathered my favourite products that give me a beautiful summer glow, without resulting in all of the nasties that the sun provide.

Firstly, here are a few of my tips to prevent all of the streaking and orangeness that may come with self tanning:
1. Exfoliate, exfoliate, exfoliate! Especially before applying the fake tan. I also do this continually through out the tan so that it fades in a natural way.

2. Moisturise is the key for your tan to look fresh.

3. Don't miss your feet or hands.. it looks tacky, so I just lightly apply a bit of the self tan to the tops of my feet and hands.

4. Wash the palms of your hands after to hide the evidence of self tanning.

5. Don't apply fake tan just after shaving or waxing, I don't know if its just me but it does not react well.


Le Tan, Fast Tan Lotion in Bronze
I find that this is the easiest self tanner to use. I just grab a little of the lotion and massage into wherever is needed. I recommend doing this in sections, for example, your calf then your thigh etc. as it does dry fast. What I like about this compare to the spray tanners is that this lotion formula is not as drying and you have more leeway to massage it into the skin.

Dove, Summer Glow in Normal to Dark
I use this moisturising lotion throughout the week whenever I can't be bothered to focus self tanning. It is super easy to manage as this was my first self tanning product before I felt my confident to try the 'full strength' ones. I'd say for my skin tone, after two or tree applications of this product it forms the perfect tan.

Le Tan, Flawless Legs in deep bronze
This rarely comes out of my beauty cabinet but when it does I am great for its existence. Basically its a spray form of foundation/bronzer for your legs. I'll apply this for special occasions to get a flawless glow to my skin. I was worried when I first tried this product that it would rub off throughout the night. But trust me it does not budge. I have gone out in a massive rain storm, into a hot club, then into bed to wake up in the morning with perfect legs. To remove wash your skin with soap and warm water. 

Also all of these self tanners never have left residue on my white sheets.


Rimmel, Natural Bronzer in 022 Sun Bronze
Without a doubt this is my favourite bronzer! I wear it all throughout the year everyday, and it lasts for ever. This product gives your skin dimension and glow without being too shimmery as it is a matte bronzer. I apply this to my checks, temples, forehead, collarbone, chest and décolletage for a complete subtle glow.


With western societies obsession with tanned, glowing skin people take this to drastic measures either sun baking or burning themselves. Obviously we are all going to have those days where we get a little to burnt for our liking. But when this happens too frequently its not a good look in my opinion. If the harsh reality of skin cancer does not motivate you to be sun aware. Just be aware that sun ages humans like crazy. For these reasons I get in the habit of applying suncream everyday to my body and face. Any SPF 30+ is perfect but these are a couple of my favourite.


Hope you all have a fab summer of relaxing and spending time with the people you love.

xoxo M

Saturday, 30 November 2013

Christmas Idea: Yoga Eye Pillow

As we are coming into December I have decided to do a few DIY projects that can be given as gifts or just something fun to make for yourself.

Even though these eye pillows are made for yoga I have decided to whip one up for my mum as a christmas present, as she suffers from extreme headaches. I thought that a yoga eye pillow would be a great way for her to de- stress and relax after a big day.

There are so many patterns online that you can use. I chose to use Hanri from yogahounds' pattern and changed it up a bit. The link to that blog is below and a recommend checking it out further;

http://yogahound.co.uk/2011/11/making-a-yoga-eye-pillow-tutorial.html

I used a sewing machine to create this pillow, even though I recommend using one you can definitely hand sew it. Also this project can be easily modified to suit anyone, for example making the fabric measurement smaller/ bigger and using desired amount of essential oil.  

What you'll need...

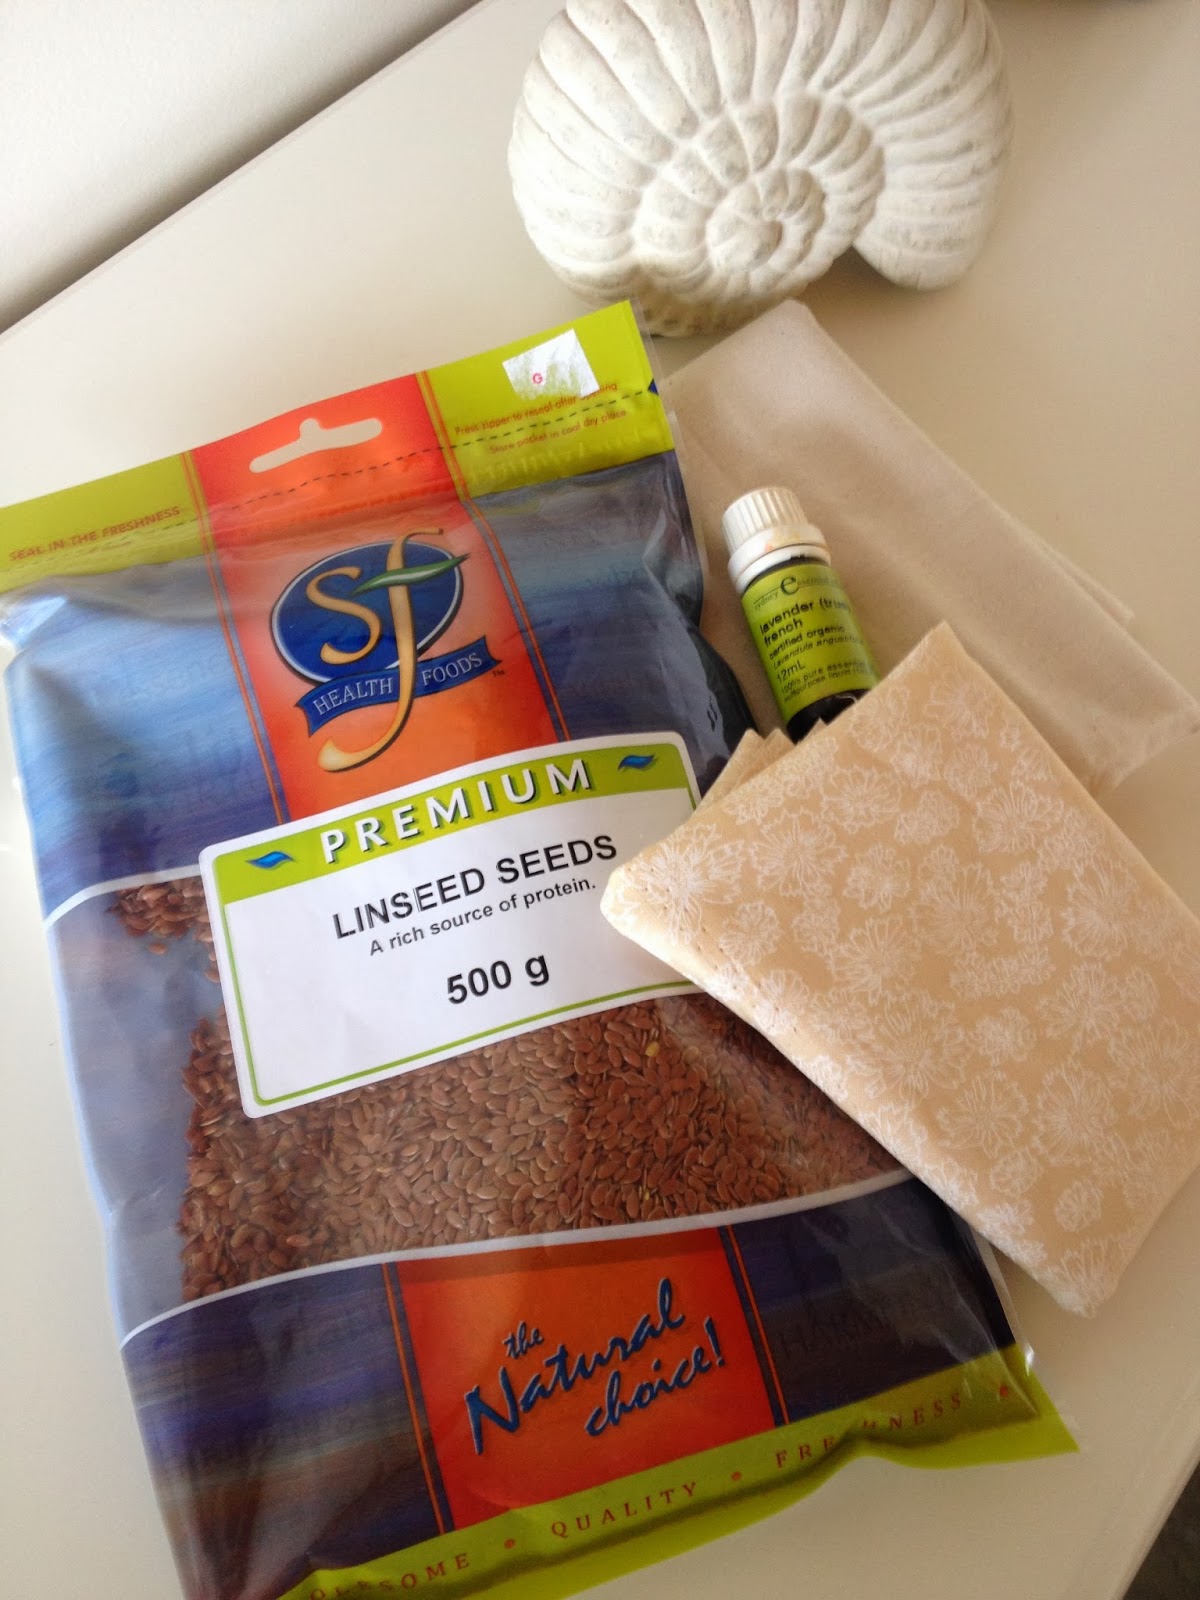
2 cups of linseeds
Lavender essential oil (or whatever essential oil best calms you)
25cm x 25cm cotton fabric (I used calico)
55cm x 14 cm nice fabric (I recommend cotton)


How?
1. Grab the cotton fabric and fold in half length ways. Sew along the top and one of the sides. Turn inside out.

2. Mix linseeds and a few drops of essential oil together in a bowl. Add more oil if desired (I got carried away and made it quite strong)

3. Pour the mix into the cotton fabric pouch that you made. Sew along the final side to secure the linseeds.


4. Place your nice fabric right side down and fold over both sides about 1 cm and sew.

5. Pop the linseed bag on top of the piece of fabric which is right side down and fold over the bag. Pin the both top and bottom seams. Then sew.


6. Turn the pillow case inside out.

7. There will now be a little hole for the bag to be placed into.

8. DONE


*You can add buttons or decorative stitching if you wish. I decided to keep mine plain.*

Now you have this fabulous eye pillow that will sooth and calm yourself.

xoxo M